Graphic coverage
Page PV-Modules: Graphical allocation
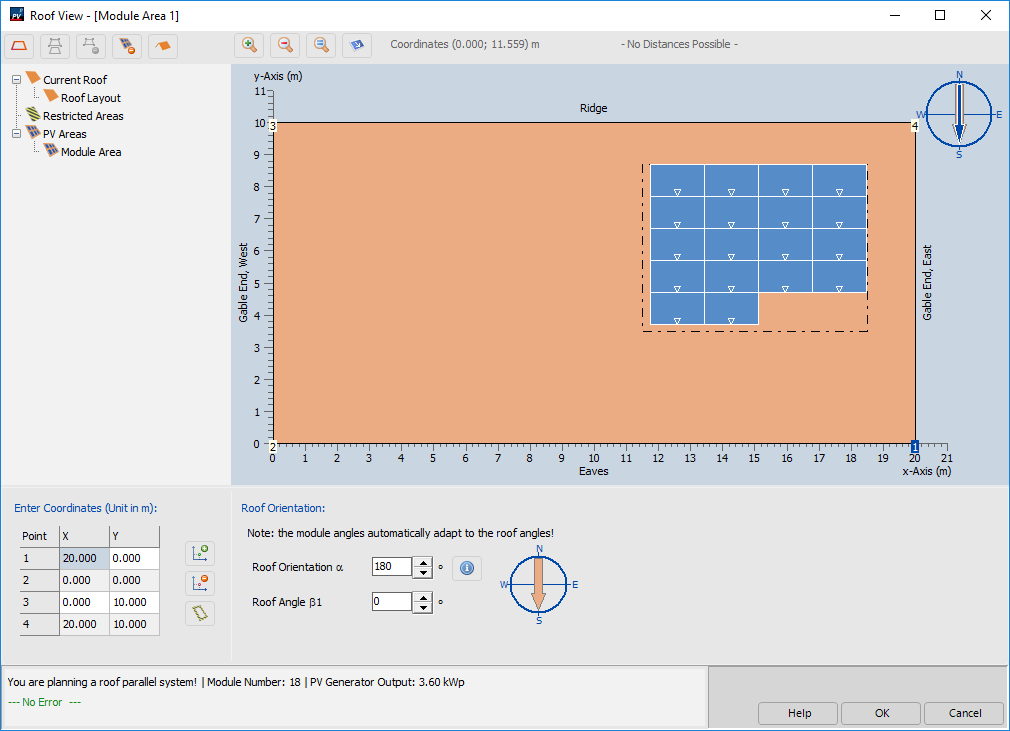
The graphical assignment shows the current roof project including occupancy and restricted areas.
Sequence of operations
-
 Edit or create current roof/ roof view
- Define dimensions, orientation and inclination
- (optional) Use the
 button to define the edge distances
-
 Define locking areas
- like chimneys or windows
-
 Define occupancy areas for PV modules
- Define mounting situation
- Specify dimensions
- Define module orientation and inclination (only in elevated installation situations)
- The compass rose at the top right of the picture shows in which direction the roof is oriented (arrow in roof color:
 ). The orientation of elevated PV modules (blue arrow:
 ) may differ from that of the roof
- Covering the occupancy area with PV modules
- Via the context menu (right click) of the allocation area it can be occupied with PV modules. The occupancy area can be occupied automatically or manually with PV modules.
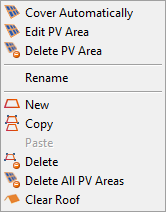
Context Menu Allocation Area
- Via the context menu (right click) of the allocation area it can be occupied with PV modules. The occupancy area can be occupied automatically or manually with PV modules.
- The following keyboard shortcuts are available for editing the module information:
- STRG + Left mouse button: Multiple selection
- SHIFT + Left mouse button: Selection of a module row
- ALT + Left mouse button: Selecting a module column
- Use the mouse wheel to zoom in or out of the roof view.
With the button new 2D objects can be created.
See also