Pages
Program interface PV*SOL
Overview of the program interface
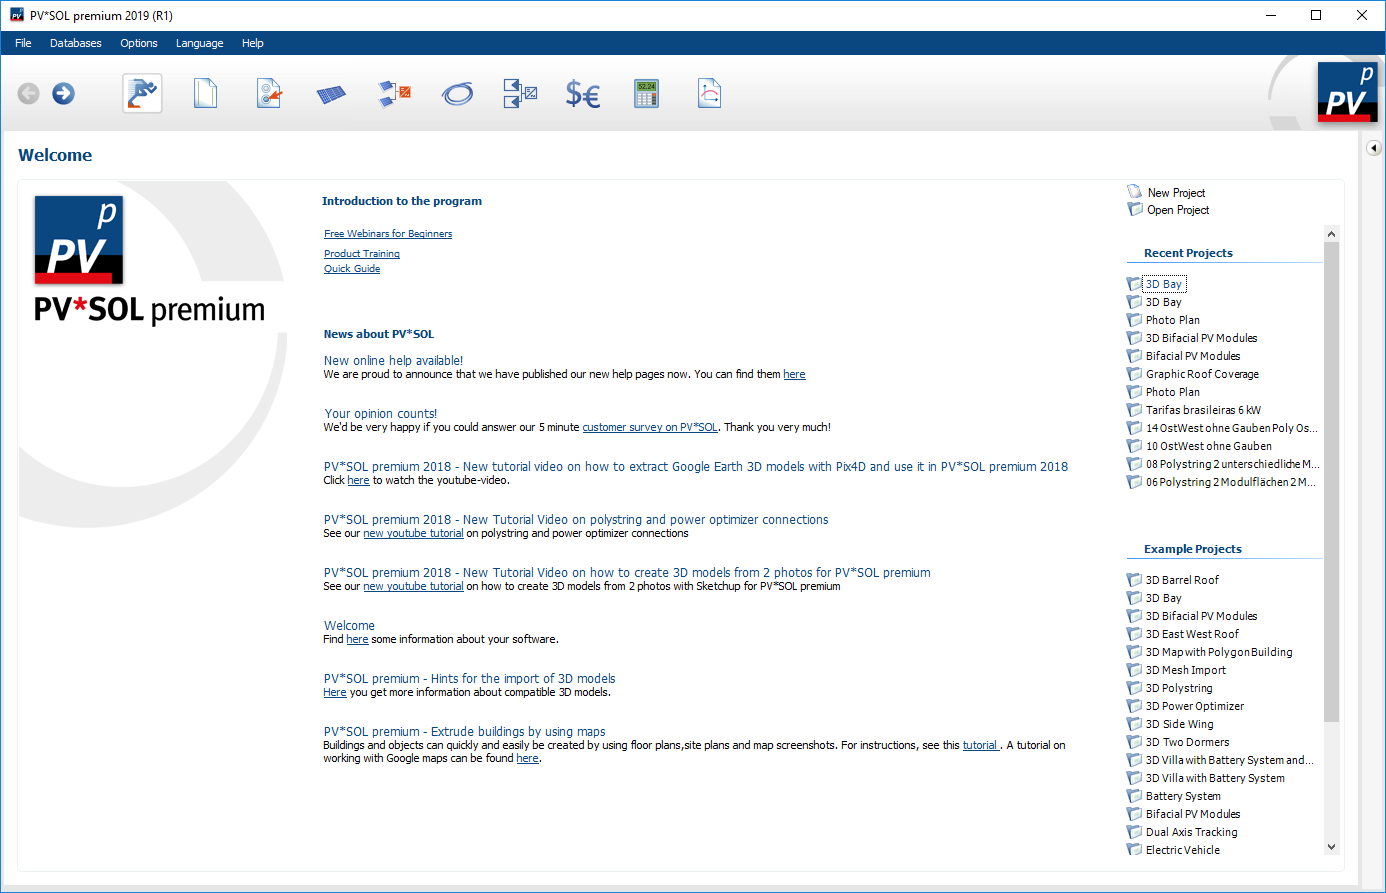
The figure shows the PV*SOL® interface after program start.
At the top is the , below the selection bar of the individual navigation pages.
In the figure shown, for example, the navigation page
![]() Welcome is shown.
Depending on which navigation page you are on, the display in the main window differs.
If required, a bar with notes, warnings and error messages is displayed at the very bottom.
On the right side you can show the project status of the current project.
Welcome is shown.
Depending on which navigation page you are on, the display in the main window differs.
If required, a bar with notes, warnings and error messages is displayed at the very bottom.
On the right side you can show the project status of the current project.
You can use the arrow icons
 and
and
 to navigate between the navigation pages.
Error messages, warnings and notes are displayed at the bottom of the “Messages” window.
On the right, in the Project Status window, is an overview of the entries made.
to navigate between the navigation pages.
Error messages, warnings and notes are displayed at the bottom of the “Messages” window.
On the right, in the Project Status window, is an overview of the entries made.
Notifications PV*SOL
Messages are displayed at the bottom of the program window. There are four categories of messages:
| Icon | Message | Description |
|---|---|---|
|
|
Information | Information gives you hints and support for the optimal design of your project. |
|
|
Warning | Warnings occur if data in your project is not consistent or if unexpected reactions occur in the program. |
|
|
No simulation | Your input data is incorrect, so that no simulation can be started. This means that you can no longer access the Results page. |
|
|
Error | Your input is incorrect. You cannot leave this page until you correct the entry. |
Overview of navigation pages in PV*SOL
| Navigation page | Description |
|---|---|
|
|
Displays various information about the program PV*SOL®. Among other things, various example projects. |
|
|
Information on project-related data, such as information on the customer. |
|
|
Here the first, external parameters of the photovoltaic system are defined. This includes the choice of the location, the definition of the AC mains, the choice of the type of planning. (2D or 3D; 3D only available for PV*SOL® premium), Selection of the type of system (grid-connected, off-grid). |
|
|
Define the energy demand that your system should cover. |
|
|
Select a module. Cover your roof area or enter the number of modules directly. |
|
|
The program determines the meaningful inverter combinations. Or you enter the inverter and the connection of the MPP trackers yourself. |
|
|
Define a diesel generator as an additional generator next to the PV system for off-grid systems. |
|
|
3D objects, (roof) area allocation, elevation, module and inverter connection, cable plan. Only available in PV*SOL® premium! |
|
|
Select a battery system. |
|
|
Select batteries and battery inverters for the off-grid system. |
|
|
Define electric vehicles which are also to be charged with solar energy. |
|
|
Define the string, direct current and alternating current lines to determine the cable losses. |
|
|
Overview of all important technical drawings, such as circuit diagrams and dimension plans. |
|
|
Enter the costs of the system and its operation to determine the profitability of the PV system. |
|
|
The simulation of the PV system is carried out and the results are displayed. |
|
|
All results are prepared graphically and can be printed out as a customer presentation or exported in pdf format. |
Quick guide for a grid-connected PV system
The following steps will lead you to your grid-connected PV system of your choice:
-
 Project Data: Enter information on the customer and the planned project (location, planned commissioning date, …).
 -
 System type, Climate and Grid:
- Select the climate data with the location.
- Define the AC grid.
- Choose the planning type (3D).
- Select a type of system: Grid-connected PV system
-
 3D design: Define the desired PV system in the 3D environment. Create the desired 3D objects and assign PV modules to them. The modules are then also connected to the desired inverters and the cable plans are created.
 -
 Cables: Define the properties (material, length) of the cables to determine the cable losses.
 -
 Plans and Parts list: Overview of all important technical drawings, such as circuit diagrams and dimension plans. Create an exportable parts list.
 -
 Financial Analysis: Enter the costs of the system and its operation to determine the profitability of the PV system.
 -
 Results: The simulation of the PV system is carried out and the results are displayed.
 -
 Presentation: All results are prepared graphically and can be printed out as a customer presentation or exported in pdf format.